
Online Appointment Request Creation
See how patients create an online appointment request after receiving your appointment link.
Updated
Firstly, with the link you provide to your patients, they can only create a request. The created request will not be directly reflected in your calendar. Only with your approval can a request be converted into an appointment and appear in your calendar.
When your patient clicks on the link you provided, they will be presented with a screen that looks like the one below. On this screen, your logo, clinic name, working hours, and clinic phone number that you have specified will be displayed on the left side.
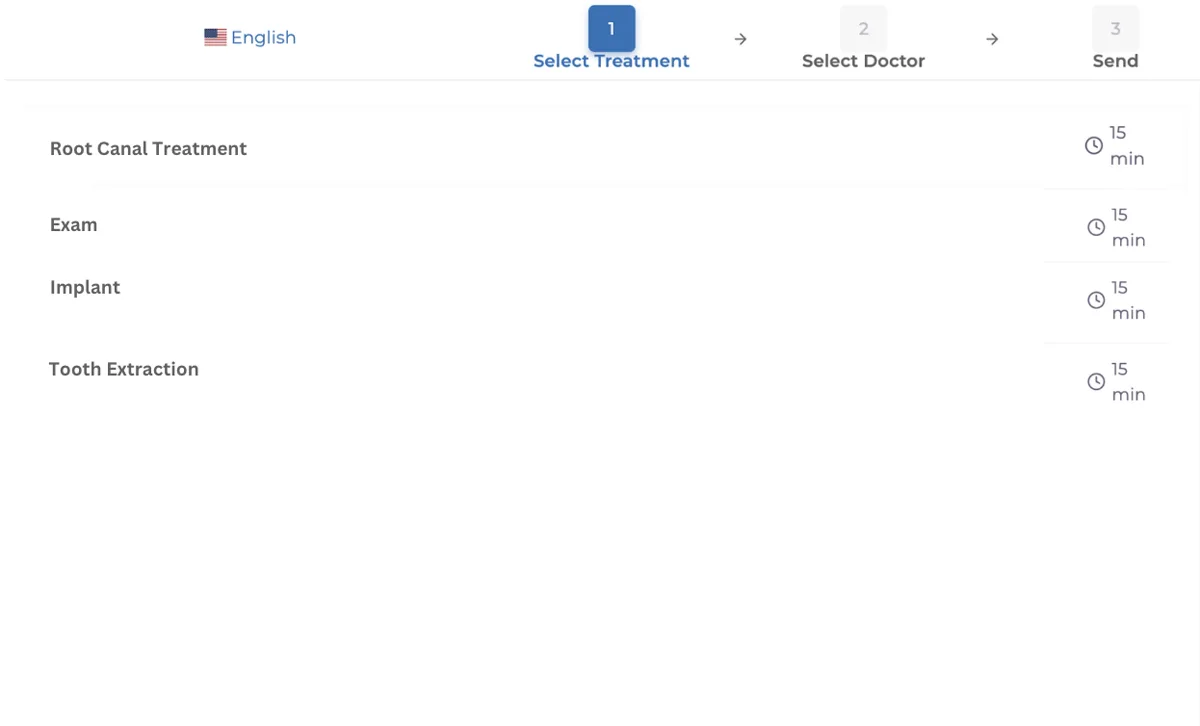
The first step is treatment selection, where the treatments you previously specified will be listed for your patient. When your patient selects and clicks on the procedure to be performed, they will be able to view and choose from available doctors, along with their available times and days.
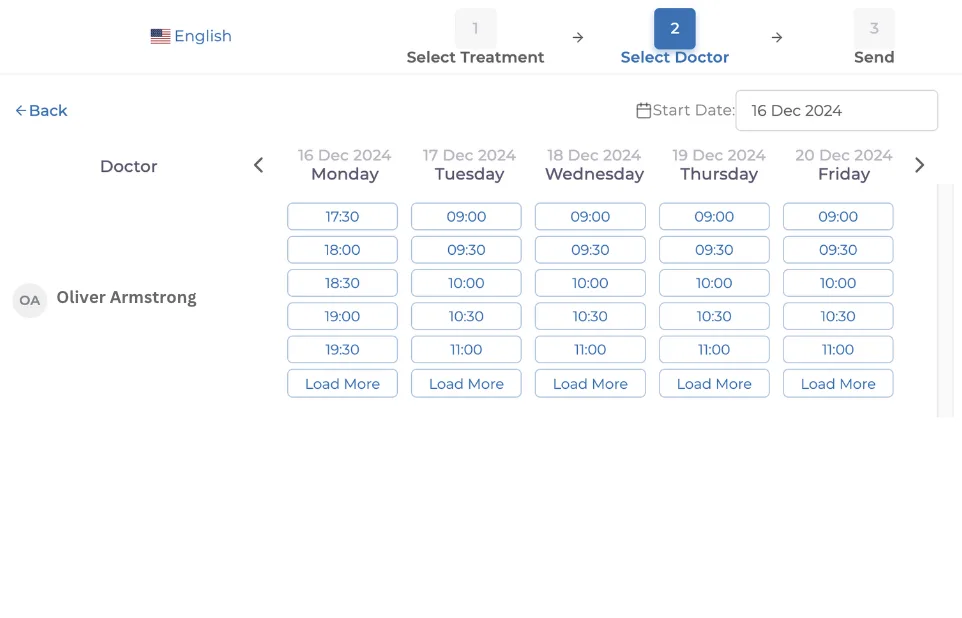
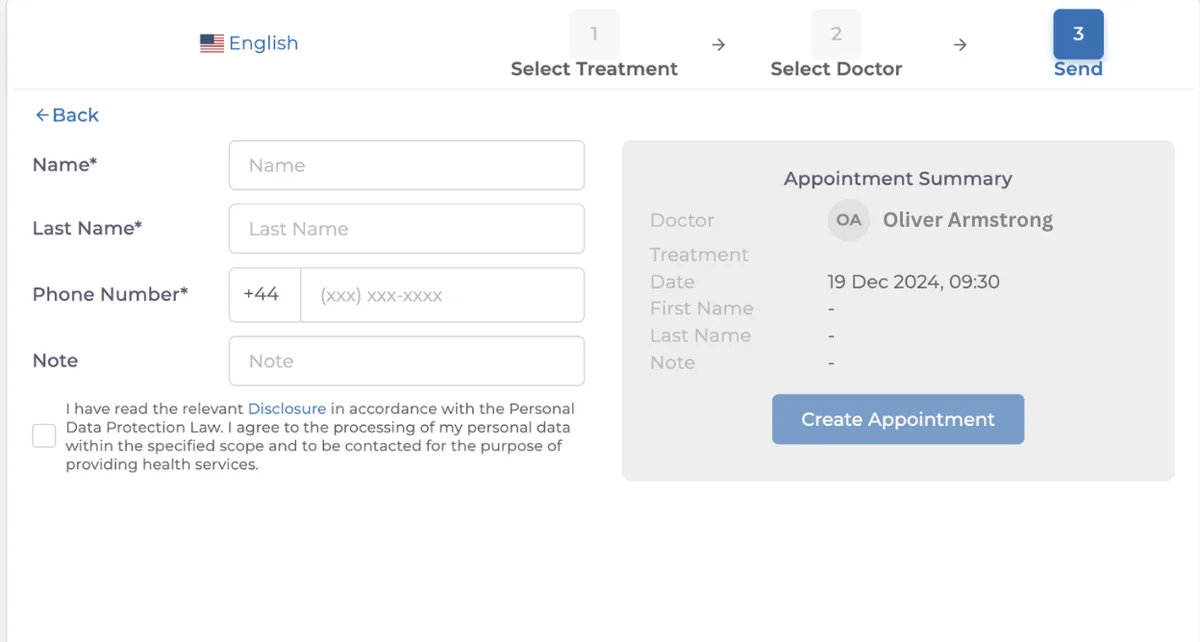
From this section, they will choose their preferred date, doctor, and time, then proceed to the third and final step, which is the personal information section. This section requires them to fill in some details, including first name, last name, phone number, and a notes section. The notes section is optional, but to create an appointment request, they must provide their first name, last name, and phone number. After completing these details, they can create their appointment request by clicking the "Create Appointment" button.
If you encounter any issues, you can get detailed assistance by contacting our team through the live chat button.