




Register Patients on Mobile by Scanning an ID Document
Scan a patient’s passport or chip ID card with the camera and NFC in the Medicasimple mobile app, then check the filled details and save the patient.
Updated
When you register a new patient in the Medicasimple mobile app, you can scan the patient’s ID document instead of typing their details. The phone camera reads the code lines on the document, then NFC reads the document’s chip and the details are filled into the patient form. You check them and save the patient.
This guide shows you how to scan an ID card or passport, what to check before you save and what to do if the scan does not finish.
Before you start: You need the Medicasimple mobile app on an iPhone or Android phone that supports NFC reading, with camera access allowed for the app. On Android, NFC must also be turned on in the phone’s settings. To install the app, see the mobile app guide. The patient’s ID document must have a chip.
Which ID documents can you scan?
Passport: the camera reads the code lines on the page with the holder’s details.
ID card with a chip: the camera reads the code lines on the back of the card.
The code lines are the two or three lines of letters, numbers and < signs at the bottom of the document. After the camera reads them, you hold the same document against the phone for the NFC step.
1. Start the scan from the new patient screen
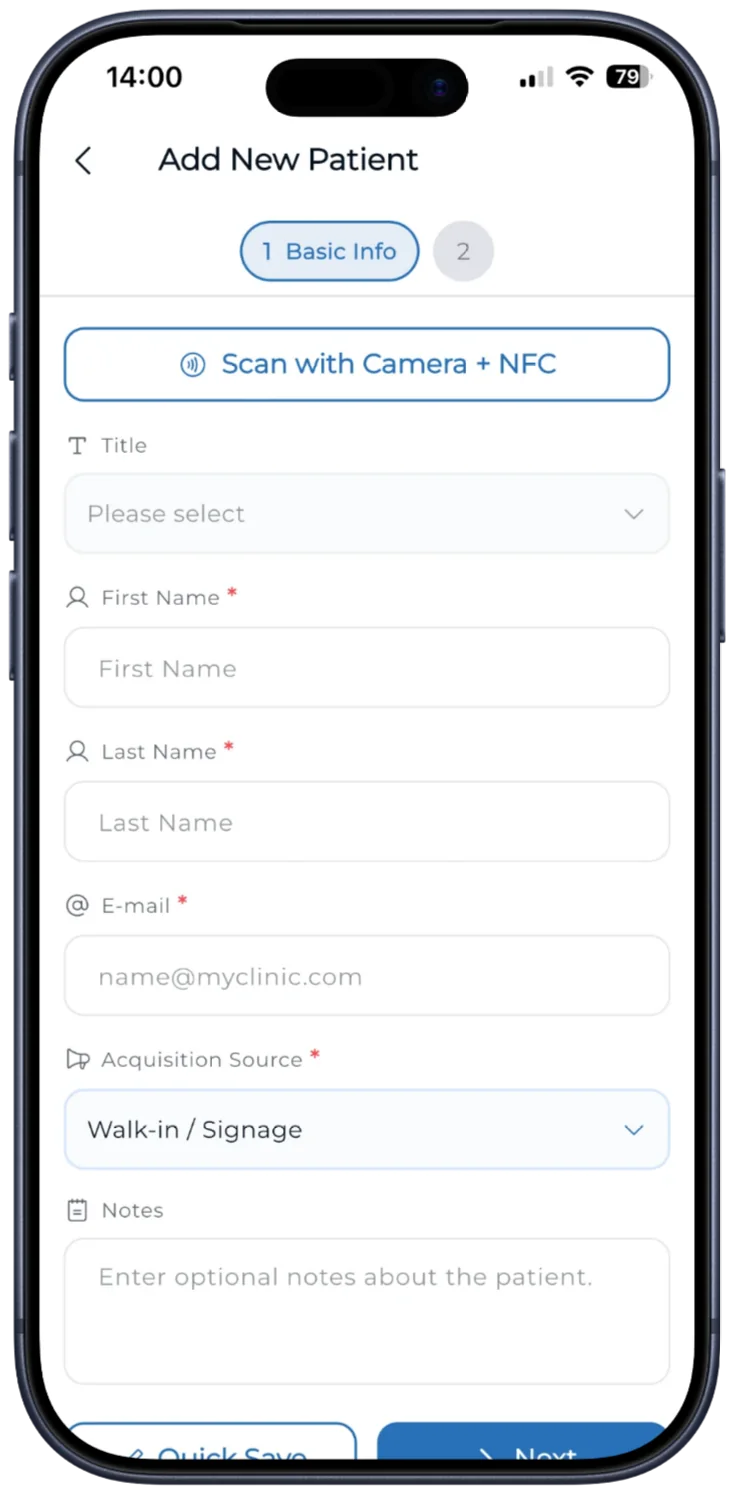
In the Medicasimple mobile app, start adding a new patient. The Add New Patient screen opens on Basic Info.
Tap Scan with Camera + NFC at the top of the form. If the app asks for camera access, allow it.
2. Read the code lines with the camera
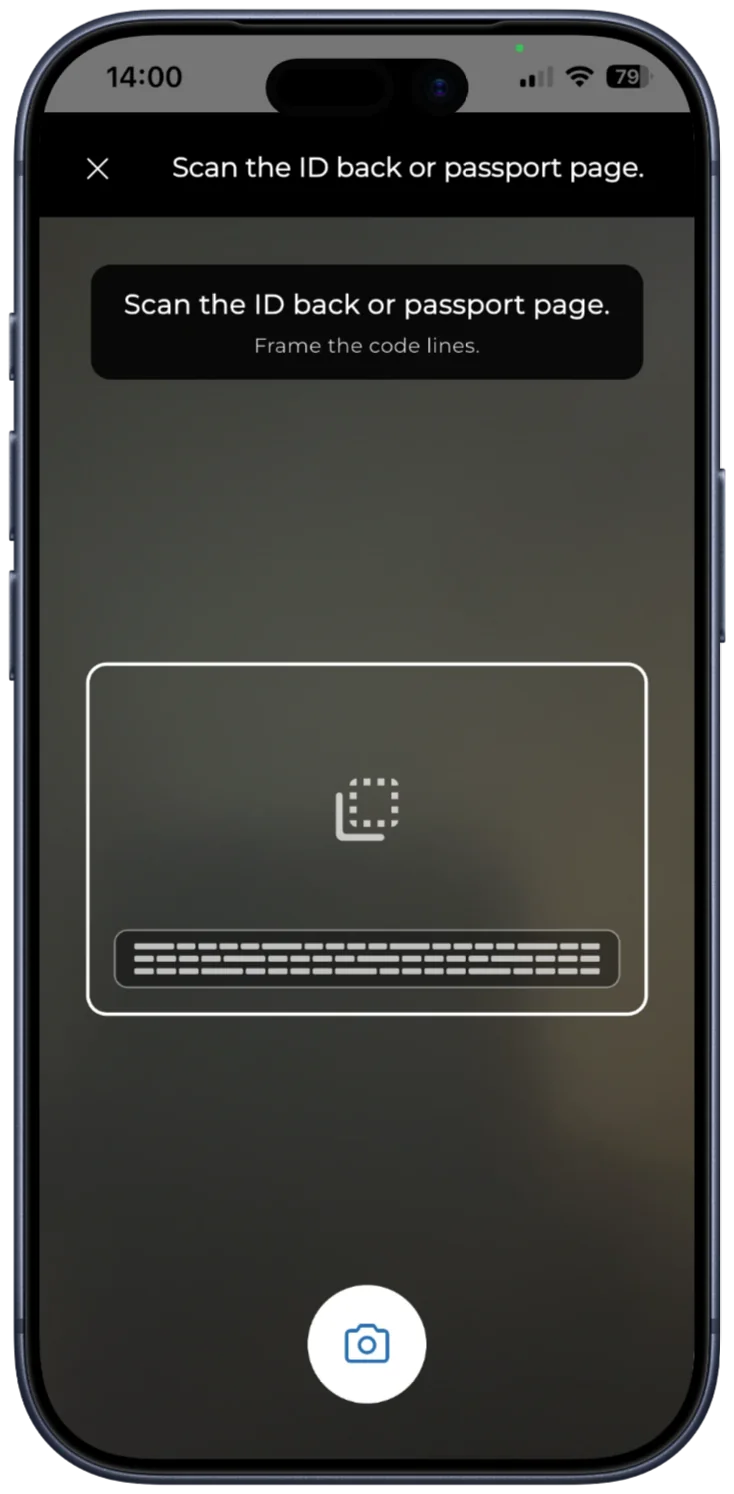
The camera opens with Scan the ID back or passport page.
Turn the ID card over, or open the passport at the page with the holder’s details.
Frame the code lines inside the box on the screen. Hold the phone steady in good light, without glare on the document.
3. Hold the document against the phone
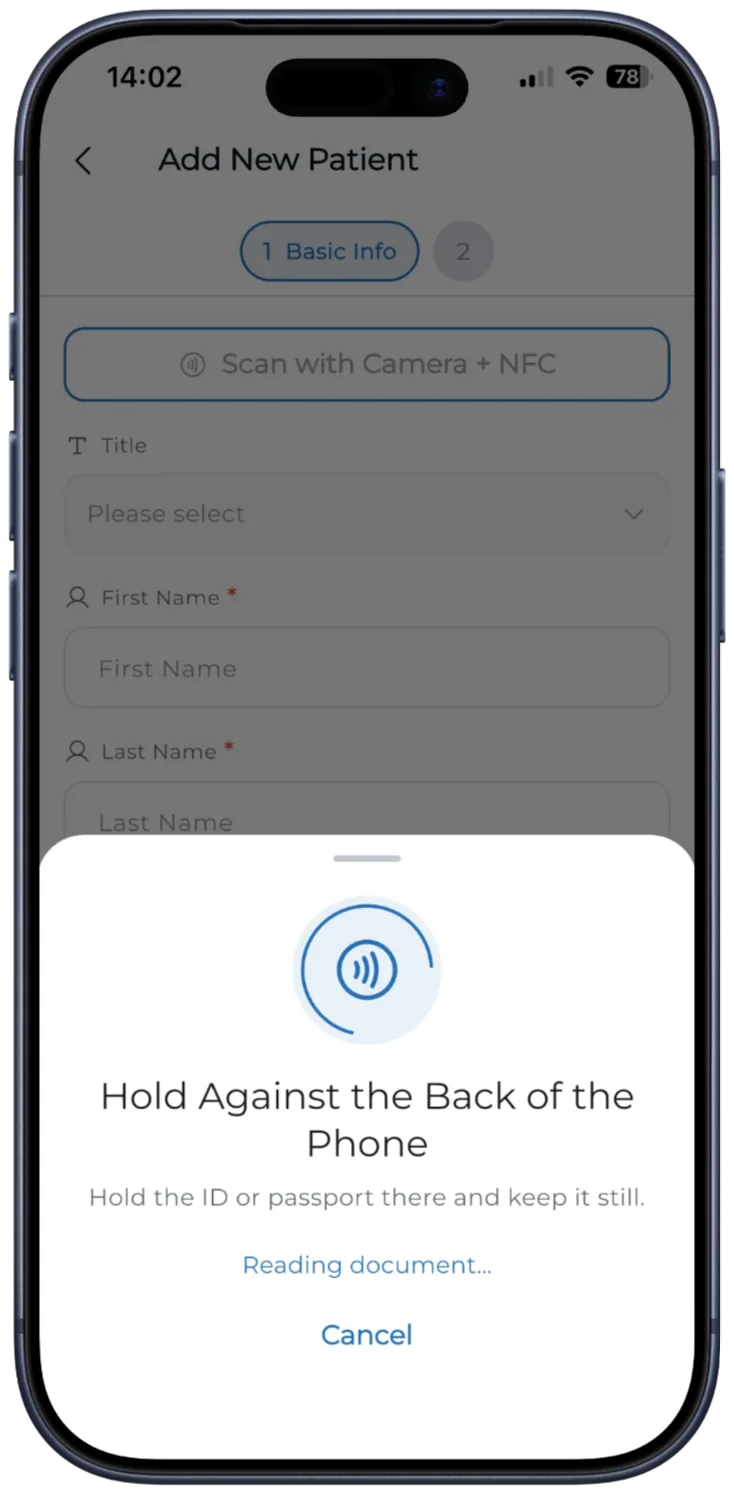
When Hold Against the Back of the Phone appears, place the same ID document flat against the back of the phone.
Keep the document still while Reading document… is shown, until the scan finishes.
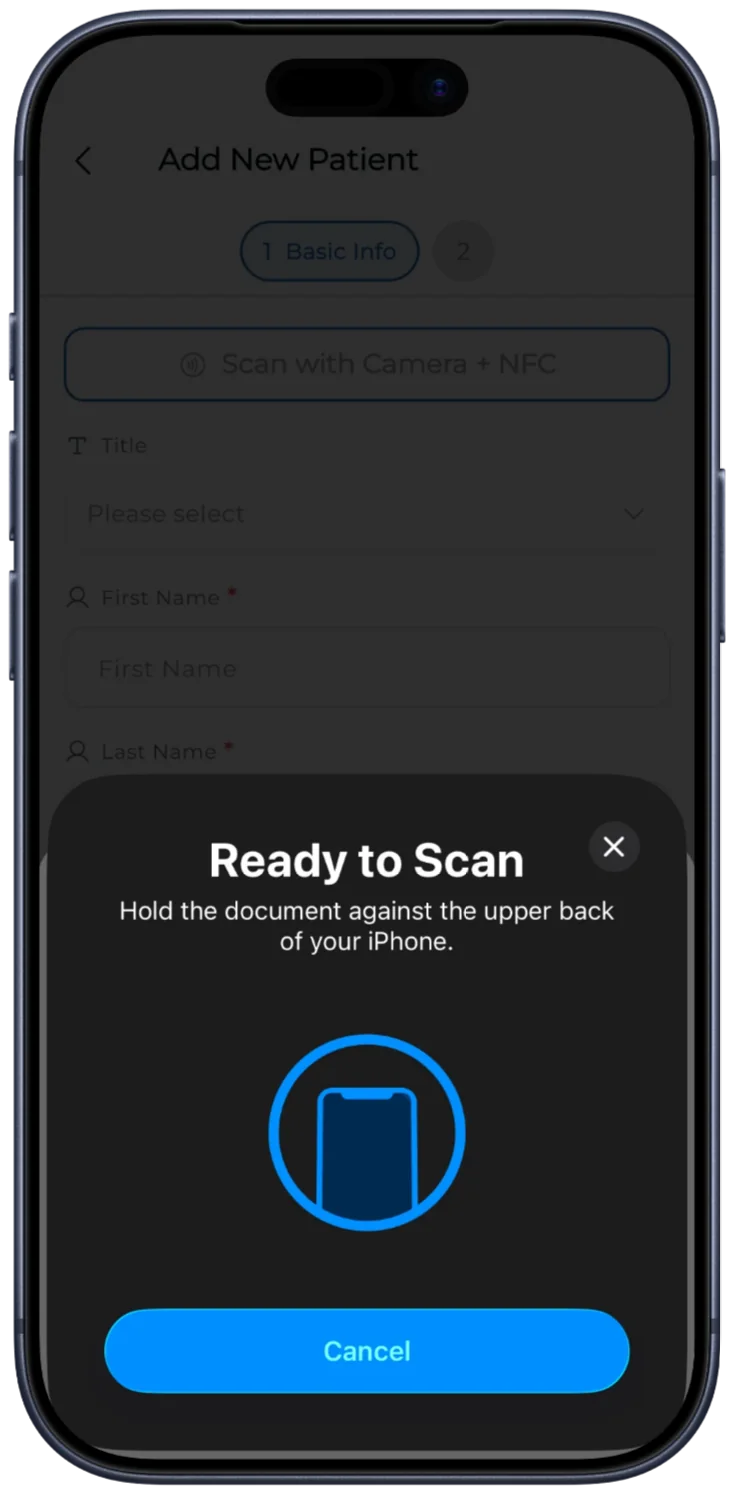
On an iPhone, the iPhone’s own Ready to Scan window also opens. Hold the document against the upper back of the iPhone until it shows Identity document read successfully.
If the scan does not start, slide the document slowly across the back of the phone. The NFC reader sits in a different place on each phone model, and a thick phone case can get in the way.
4. Check the details and save the patient
When the scan finishes, the details from the document are filled into the patient form and the app shows one of these messages:
Details and photo filled. The details and the photo stored on the chip were added.
Details filled from NFC. The details were added.
Details filled, but photo couldn’t be read. The details were added without the photo. You can add a profile photo later from the patient’s profile.
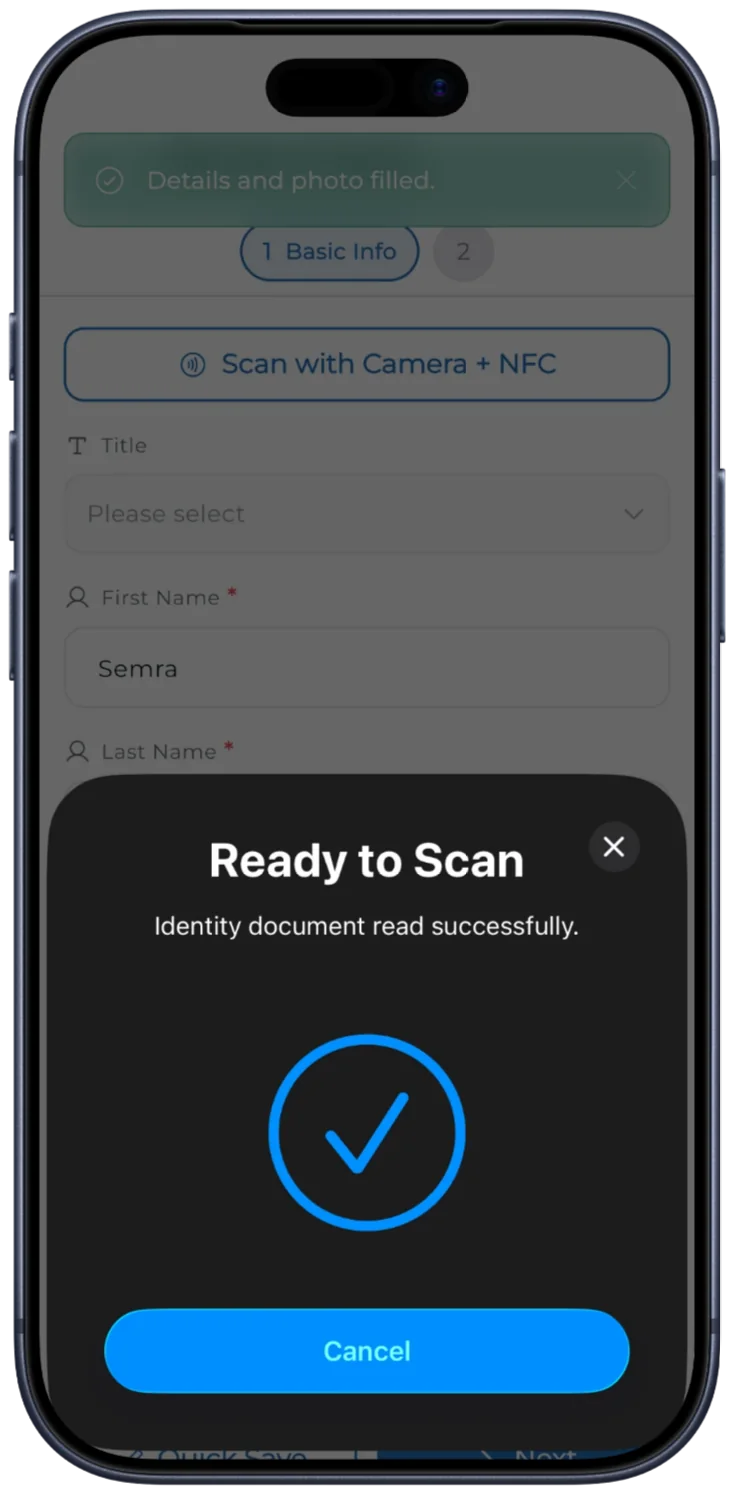
Check the filled details, especially the name, date of birth and ID Number.
Add the details an ID document does not contain, such as the phone number or email address.
Save the patient.
Important: Scanning only fills the form. The patient is registered when you save, so check the details first.
Troubleshooting
NFC is off. Enable it in Settings.
Turn on NFC in your phone’s settings and start the scan again.
This device doesn’t support NFC reading.
Use a phone that supports NFC reading, or enter the patient’s details by hand.
Document details couldn’t be read.
The camera could not read the code lines. Make sure all the lines are inside the frame, the document is flat and there is no glare, then try again.
Document Doesn’t Match
The details read by the camera do not match the chip. Make sure you use the same document in both steps and scan again.
Scan Interrupted or No document detected.
Hold the document against the back of the phone again and keep it still until the scan finishes. If needed, slide it slowly to find the NFC reader or remove a thick phone case.
NFC is busy. or Document Not Read
Wait a moment and try again.
Camera permission required for ID scanning.
Allow camera access for Medicasimple in your phone’s settings.
If the scan still does not finish, contact our support team.
Good to know
ID document scanning is available in the Medicasimple mobile app on iPhone and Android.
If a document cannot be read, or the patient does not have a document with a chip, enter their details by hand as usual. See Registering a New Patient.
You can change the details later from the patient’s profile. See Editing Patient Information.
Frequently asked questions
Is the patient saved as soon as the document is scanned?
No. Scanning fills the patient form. You check the details and save the patient yourself.
Can I scan a passport?
Yes. Open the passport at the page with the holder’s details for the camera step, then hold the passport against the phone for the NFC step.
Does it work on iPhone and Android?
Yes. Scanning works in the Medicasimple mobile app on iPhone and Android phones that support NFC reading. On an iPhone, hold the document against the upper back of the phone when the Ready to Scan window opens.
What if my phone does not support NFC?
The app tells you the device does not support NFC reading. Enter the patient’s details by hand, or use a phone that supports NFC reading.
Keep going